Posts Tagged With: summer

Pineapple & White Chocolate Pavlova

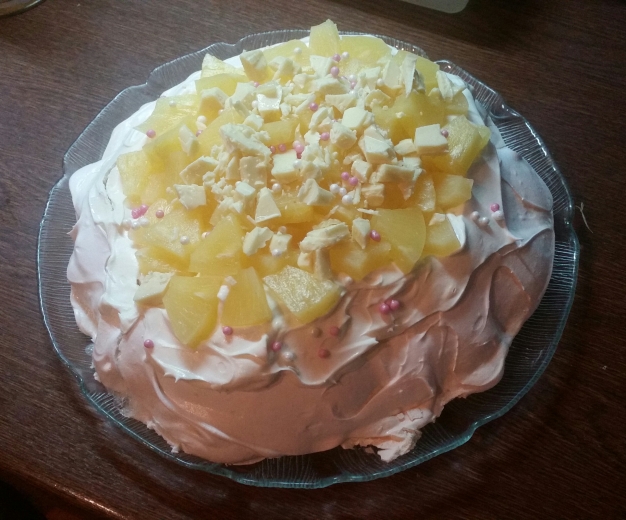
Following the success of my first ever homemade meringues back in October last year, I’ve been keen to have a go at a full-blown pavlova. A sweet, snowy mountain adorned with smooth white cream and colourful fresh fruit, I’ve always thought pavlovas make a spectacular dessert, as well as being a nice lighter alternative to cake.

I thought if my attempt turned out like the delicious marshmallowy-on-the-inside-crisp-on-the-outside individual little clouds I made previously I’d be happy, but I was worried that this monster version would be more temperamental, and cook unevenly or shatter into sad little bits of chalk dust when baked. Luckily, I needn’t have had such concerns as it came out beautifully.

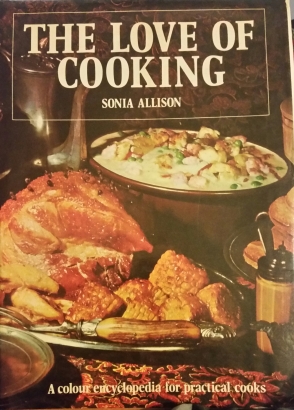
Although the topping combination was my idea, I can’t take credit for the meringue base here. My kitchen-whizz mum suggested I use her failsafe pavlova recipe from her trusty old copy of The Love of Cooking by Sonia Allison (from 1972!), and it proves that the oldies are certainly goodies as it worked perfectly. It’s definitely going to be be my go-to recipe in future!
20170311_203249-1

Now here I must confess that I’m not a massive fan of berries, which are a staple of the quintessential pavlova. I love anything strawberry, raspberry or blueberry flavoured, but I just don’t enjoy the texture of the fruits themselves. However, I needed something that would cut through the sweetness of both the meringue and white chocolate, so I decided to use refreshingly sharp pineapple instead and I think it worked really well.

The finished article went down an absolute storm with my family, and I’ve definitely been bitten by the homemade meringue bug, so I’ll certainly be making more pavs in the future!
20170218_180430-1

INGREDIENTS – serves approx. 6 people

For the meringue base:

  • 4 egg whites
  • 225g/8 oz caster sugar
  • Quarter tsp cream of tartar
  • 2 tsp cornflour
  • 1 tsp vinegar (any kind will do)

For the topping:

  • 1 x 36g sachet Dream Topping + milk as needed by the packet instructions (or 250ml/0.5 pint double cream)
  • 1 x 432g can pineapple chunks or slices in juice, drained
  • 50g/1.5 oz white chocolate, chopped into chunks
  • A sprinkling of white and pink edible pearls (optional)

METHOD

For the meringue base:

  1. Pre-heat the oven to 130 degrees C (or 110 fan) and line a large flat baking tray with parchment paper.
  2. Place the egg whites in a very clean mixing bowl and whisk with the cream of tartar until white and frothy.
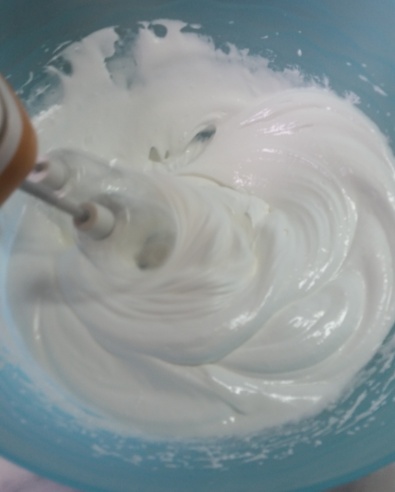
  3. Continue to whisk while adding the sugar a few tablespoons at a time until stiff, glossy peaks form – this will take a good few minutes (you should be able to hold the bowl of mixture over your head without it spilling out!)IMG_rd1c9n
  4. Gently fold in the cornflour and vinegar with a spatula (and don’t panic at the odd acidic smell like I did – this will disappear once it’s cooked, I promise!)
  5. Dollop the mixture in a rough circle on the baking parchment, ensuring it’s in a thick layer so you can’t see the paper through it at any point.
  6. Place in the oven and bake for around 1-1.5 hours, until a crisp shell has formed and the meringue is very slightly golden on the top but mostly white.
  7. When cooked, remove from the oven and leave to cool.

For the topping:

  1. Prepare the Dream Topping (or cream) according to the packet’s instructions – it should be quite thick and not runny – and then pile it on top of the meringue base.
  2. If using pineapple slices, cut them into small chunks and scatter on top of the Dream Topping, followed by the white chocolate chunks.
  3. Finish with a sprinkling of a few pretty pink and white pearls if you fancy, and serve immediately.
Categories: Other Treats | Tags: , , , , , , , , , , , , , , , , , | Leave a comment

Cherry Bakewell & Cherry Chocolate Scones

Apologies for the lack of action on my blog recently – I’ve been back in my hometown doing some office temping at my old workplace for the last three weeks and left all my recipes back in my flat in London! I’ve also not been doing so much baking recently due to the sweltering weather (I’m not good with heat; I’m a bit of a summer grinch!)

Anyway, here’s a recipe for Cherry Bakewell and Cherry Chocolate Scones that I’ve been meaning to post for a while. I love scones as they’re so darn simple to make – nothing but flour, butter and milk in their most basic form – and they’re very versatile, so I decided to do a decadent twist on the traditional plain kind for Sunday Baking Club’s (@SundayBakeClub on Twitter) charity cherry theme a while back.

Both types came out really well and tasted delicious with a bit of butter, or just on their own (mountains of jam and clotted cream not required here unless you have an incredibly sweet tooth!) The chocolate ones had a sweet, sticky texture and the bakewell ones had a lovely marzipan-like flavour. Perfect to enjoy as part of an alfresco afternoon tea!
20150523_162427

INGREDIENTS – makes approx. 8-10

For the cherry bakewell scones:

  • 250g/9 oz self-raising flour
  • 55g/2 oz butter
  • 25g/1 oz caster/granulated sugar
  • 150ml/5 fl oz milk
  • 40g/1.5 oz glace cherries, chopped
  • 2 tsp almond essence
    To decorate:
  • 2 tsp almond essence
  • 1 tbsp icing sugar
  • 4-5 glace cherries, halved

For the cherry chocolate scones:

  • 250g/9 oz self-raising flour
  • 55g/2 oz butter
  • 25g/1 oz caster/granulated sugar
  • 150ml/5 fl oz milk
  • 2 tbsp cocoa powder
  • 40g/1.5 oz glace cherries, chopped
  • 40g/1.5 oz dark or milk chocolate, chopped
  • 0.5 tsp vanilla extract
    To decorate:
  • Handful of flaked almonds
  • 2 tsp icing sugar
  • Few drops of milk or water

METHOD

For the scones:

  1. Pre-heat the oven to 180 degrees C (or 160 fan) and line a large rectangular baking tray with parchment paper.
  2. Place the flour, sugar and chopped cherries (plus the cocoa powder and chopped chocolate if making the chocolate scones) in a large mixing bowl and make a well in the middle.
  3. Place the butter, milk and almond essence (if making the bakewell scones) or vanilla extract (if making the chocolate scones) in the well and roughly mix with a knife.
  4. Rub the liquid into the dry ingredients with your hands until a pliable dough forms. If the mixture is too sticky, add a little more flour and if it’s too crumbly, add a little more milk.
  5. Place the dough on a floured surface and roughly pat until it’s around 3cm/1in in thickness, then cut out scones with a large round or fluted cookie cutter. Squish the offcuts together and repeat until all the dough is used.
  6. Place the scones on the prepared baking tray and bake in the oven for around 15 minutes until they’re slightly brown on the bottom.
  7. Leave the scones to cool on a wire rack. They can be frozen at this stage if you wish.

For the cherry bakewell decorations:

  1. Mix the icing sugar and almond essence together thoroughly until a runny mixture forms.
  2. Drizzle in a criss-cross lattice pattern over the cooled scones then top each one with half a glace cherry.

For the cherry chocolate decorations:

  1. Mix the icing sugar and milk/water together thoroughly until a runny mixture forms.
  2. Place a small blob in the centre of the top of each scone using a teaspoon, then arrange 5 flaked almonds in the shape of flower petals using the icing as ‘glue’. Finish each flower with a tiny blob of icing in the centre.
Categories: Chocolate, Other Treats | Tags: , , , , , , , , , , , | 1 Comment

Plimmsberry Cupcakes

Originally posted 28/07/2013

I’ve been on a bit of a baking hiatus recently due to the horrendously sweltering weather and so I’ve been indulging my cravings for homemade goodies by whipping up simple no-cook rocky road and cheesecake, but I realised I forgot to post the recipe for these lovely summery and quintessentially British cupcakes I made back when Wimbledon fever was abound here in the UK and I could still switch on the oven without melting.

The Pimms jam filling was an impulse invention of mine that turned out deliciously, but I don’t think I’ll be trying this technique for meringue icing again a hurry. Although it was light and tasty and significantly lower in fat than standard buttercream frosting, it was a bit of a fiddly faff-fest to make, and after being piped onto the cakes it shrunk within a few hours. Therefore, I strongly recommend that you don’t frost the cakes until just before you serve them! I also ended up with an obscene amount left over; the recipe I originally used said it was just enough for 12 cupcakes but I’ve reduced the quantities below to a (hopefully) a more accurate estimate, although obviously it depends how much of the icing you want to top each cake with. I think if I made these cupcakes again I’d perhaps top them with freshly whipped cream instead as it’d be less of a hassle but would go very nicely with the jammy centres.

I have to confess that the redcurrants out of the garden were far too sharp to be edible and were for decorative purposes only, but I thought they made a charming finishing touch skewered on the wee cocktail sticks. Cheers!

INGREDIENTS – makes approx. 10-12 small cupcakes

For the cakes:

  • 115g/4 oz self-raising flour
  • 115g/4 oz caster/granulated sugar
  • 115g/4 oz margarine/butter
  • 2 eggs
  • 1 tsp vanilla extract
  • 1/4 tsp baking powder

For the jammy ‘Plimmsberry’ filling:

  • 6 tsp (approx.) strawberry jam
  • 6 tsp (approx.) plum jam
  • 20 ml (approx.) Pimms

For the icing:

  • 1 or 2 egg whites (depending on how much icing you want to cover the cakes in)
  • 2 or 4 oz/55g or 115g caster/granulated sugar
  • 1/2 or 1 tsp vanilla extract

+ 12 cocktail sticks + 24 redcurrants (optional)

METHOD

For the cakes:

  1. Pre-heat the oven to 180 degrees C (or 160 fan) and line a baking tray with 12 paper cases.
  2. Whisk the margarine/butter and sugar together in a large mixing bowl until pale then whisk in the eggs.
  3. Fold in the flour, baking powder and vanilla extract until a batter of a soft dropping consistency has formed.
  4. Drop the mixture into the cake cases using a teaspoon until they’re each about three quarters full.
  5. Pop in the oven and bake at 180 degrees C for about 12-15 minutes until a cocktail stick inserted into the sponge comes out clean.
  6. When baked, place on a wire rack and leave to cool. At this stage the cakes can be frozen for decorating at a later date if you wish.

For the filling & icing:

  1. Roughly mix the two types of jam and the Pimms together in a small bowl.
  2. Using a teaspoon or small sharp knife, carefully cut a small hole (about 2cm deep by 2cm wide) in the top of each cupcake. Don’t discard the bits you’ve cut out!
  3. Drop about a teaspoon of the ‘Plimmsberry’ jam into each hole and then gently push the sponge part that was cut out back into each one.
  4. To create the meringue icing just before serving, separate the whites of 1 or 2 eggs into a heatproof bowl which can sit over the top of a saucepan of hot water without touching the water, and put the yolks to one side (these can be used to make choc mousse or eggy bread or something later!)
  5. Boil the kettle and fill the saucepan with a small volume of water and leave to cool slightly on the hob (don’t turn it on yet!) while beginning to whisk the egg whites on a high speed until they begin to stiffen and form peaks – this should be done for a minimum of 3 minutes.
  6. Switch the hob onto a LOW heat and place the bowl of egg whites onto the saucepan, ensuring that the hot water does not touch the bottom and that the water does not boil, then begin whisking on high speed again while gradually adding the sugar and vanilla extract.
  7. Continue to whisk thoroughly until all the sugar has dissolved – this will take at least 5 minutes or so. If, like me, you don’t own a fancy sugar thermometer, you can test to see if the sugar’s dissolved by pinching a small amount of the mixture between your fingers – if it feels gritty it needs further whisking. At this point the mixture may turn flat and runny but don’t panic, just keep on whisking and it will thicken again.
  8. Once all the sugar has dissolved and the egg whites have formed stiff, glossy peaks, switch the hob off and transfer the meringue into a piping bag with the nozzle of your choice (I used a star attachment) then pipe swirls onto each cake.
  9. Spear two of the redcurrants onto each cocktail stick then insert into the cakes if you wish.

Remember, the icing doesn’t keep well so make sure you scoff right away 🙂

Categories: cupcakes | Tags: , , , , , , , , , , , , , | Leave a comment

Lemon Sunflower Cupcakes

Originally posted 14/06/2013

I made these lovely summery cupcakes for Sunday Baking Club’s (@SundayBakeClub on Twitter – go follow them for fabulous baking fun!) ‘Citrus Zing’ themed competition and they received a lot of compliments from other entrants 🙂 The pretty sunflower design also provoked much cooing in admiration when I took them into work! I’d never used lemon extract before but my mum and I were given a free bottle when we went to the Good Food show back in November and I have to say I was very pleasantly surprised by the delicate citrus flavour it gave to the buttercream without making it taste at all synthetic. Both my dad and brother said that they were not fans of lemon but that these cakes were delicious and not too overwhelmingly ‘citrussy’. You could of course use real lemon juice, though!

The icing technique is a heck of a lot simpler and quicker than it looks – in fact, I personally find it much easier to do than regular swirly piping. Chocolate buttons are a simple and yummy way of creating the centre of the sunflower but you could also add black/chocolate icing using the same piping technique as the petals for a more textured look. The ladybirds were a last minute addition but they make a nice colourful finishing touch and are so easy to create!

I also made some diddy versions using a miniature silicone muffin tin 🙂

INGREDIENTS – makes approx. 15-18

For the cakes:

  • 170g/6 oz self-raising flour
  • 170g/6 oz caster/granulated sugar
  • 170g/6 oz margarine/butter
  • 3 eggs
  • 1/4 tsp baking powder
  • 2 tsp lemon extract

For the icing/flower centres/ladybirds:

  • 280g/10 oz icing sugar
  • 140g/5 oz butter (unsalted if preferred)
  • 1 tsp lemon extract
  • 2 tsp yellow food colouring
  • 15-18 large milk chocolate buttons
  • A few red Smarties or M&Ms
  • Small tube of dark chocolate or black writing icing

METHOD

For the cakes:

  1. Pre-heat the oven to 180 degrees C (or 160 fan) and line two baking trays with 18 paper cake cases.
  2. Whisk the margarine/butter and sugar together in a large mixing bowl until pale then whisk in the eggs.
  3. Fold in the flour, baking powder and lemon extract until a batter of a soft dropping consistency has formed.
  4. Drop the mixture into all of the cake cases until they’re each about three quarters full.
  5. Pop the cupcakes into the oven for about 12-15 minutes until a cocktail stick inserted into the sponge comes out clean.
  6. When baked, place on a wire rack and leave to cool. At this stage the cakes can be frozen for decorating at a later stage if you wish.

For the icing, flower centres & ladybirds:

  1. Place the butter, lemon extract and food colouring into a bowl and whisk while gradually adding the icing sugar until a thick, fluffy mixture has formed. If the icing is too pale, add a little more colouring.
  2. Spoon the icing into a piping bag with a rope or star nozzle attachment and pipe little rosettes in circles around each cake, working from the outside then moving inwards to the centre, then firmly push a large chocolate button into the middle.
  3. Use the dark chocolate/black writing icing tube to pipe a ‘T’ shape onto each Smartie/M&M then add two dots either side of each line to create the ladybirds’ eyes and spots, as per the photo. Place randomly onto your chosen cakes.

Edit: I used this recipe to create my stepgrandad’s birthday cake – he absolutely loved it! 🙂

Categories: cupcakes | Tags: , , , , , , , , , , , , , | Leave a comment

Create a free website or blog at WordPress.com.