Posts Tagged With: buttercream

Caramel Coffee Cake

I should probably start by saying that one of my pet hates is promotional blog posts that fawn over products that have been sent to the blogger in return for free advertising so apologies if this is a bit hypocritical, but I must say that this particular type of coffee really made this Caramel Coffee Cake special. And I promise I’ve not been given any incentive to promote it!

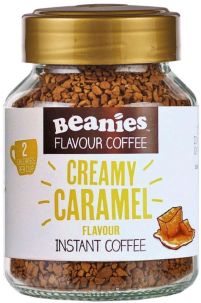
The product in question is Beanies caramel flavour instant coffee. My mum bought a jar of it from Aldi a few weeks ago and I was captivated by the absolutely heavenly aroma wafting from the cup as it brewed.

beanies-coffee-creamy-caramel-flavour-instant-coffee-50g-37317-p

Now, I actually cannot stand the taste of coffee, but bizarrely I love it in cake form and knew I had to try and bake with this angelic smelling stuff! And a 50th birthday for a java-loving colleague at work was the perfect excuse to try.

The recipe is extremely simple – pretty much just a slightly adapted Victoria sponge and standard buttercream – but the caramel coffee really takes the flavour to another level of deliciousness.

Screenshot_2017-06-04-11-51-06-1

INGREDIENTS – makes 3 shallow or 2 deep sponge layers of 20cm/8 in diameter

For the cake:

  • 225g/8 oz self-raising flour
  • 140g/5 oz caster/granulated sugar
  • 55g/2 oz brown sugar
  • 225g/8 oz butter/margarine
  • 4 eggs
  • 1 tbsp Beanies caramel coffee granules dissolved in 1.5 tbsp boiling water

For the buttercream icing/topping:

  • 55g/2 oz butter
  • 140g/5 oz icing sugar
  • 0.5 tbsp Beanies caramel coffee granules dissolved in 1 tbsp boiling water
  • Handful of mini salted caramel fudge pieces, or other fudge/toffee type sweets chopped into small pieces
  • 50g/1.5 oz dark chocolate, chopped into small pieces

METHOD

For the cake:

  1. Pre-heat the oven to 180 degrees C (or 160 fan) and line two or three round baking tins with parchment paper.
  2. Whisk the butter/margarine and sugars together in a large mixing bowl until pale, then whisk in the eggs.
  3. Fold in the flour and coffee until a batter of a soft dropping consistency has formed.
  4. Pour the mixture into the prepared cake tins, then pop in the oven and bake for around 15-20 minutes until a cocktail stick inserted into the sponges comes out clean.
  5. When baked, transfer the cakes onto a wire rack and remove from the tins when cool. At this stage, the sponges can be frozen for decorating at a later date if you wish.

For the buttercream/topping:

  1. Place the butter and coffee in a bowl and gradually beat in the icing sugar until smooth and spreadable (if it’s too runny, add a bit more icing sugar until you have the desired consistency).
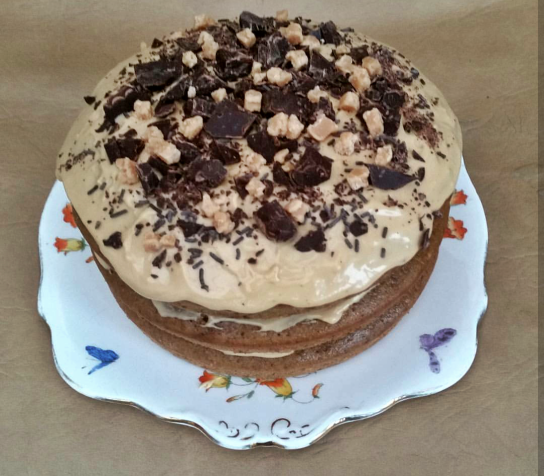
  2. Spread half of the buttercream on top of one of the cooled sponges (or one third if using three layers), then place the other sponge on top and spread with the remaining buttercream (or divide it between the remaining two sponges if using three layers).
  3. Sprinkle the chopped dark chocolate and fudge pieces over the cake before serving.
Categories: Icing, Layer Cakes | Tags: , , , , , , , , , , , , , , , | Leave a comment

Cookbook Challenge 1 – Mary Berry’s Coffee Cake

Pretty much all of my baking is based on ideas I’ve made up myself or adapted from existing recipes found online. It’s nice to be creative and come up with my own original bakes but I own so many lovely cookbooks that it’s a shame how little I actually use them! I also sometimes frustrate myself by not bothering to follow a recipe and then ending up with a sloppy, slapdash result. For these reasons I’ve set myself the challenge of making at least three creations from cookbooks, instructions followed to the letter, in the coming months.

I started off with this wonderfully easy but delicious all-in-one coffee cake from Mary Berry’s Simple Cakes book (it’s actually a recipe for Hokey Pokey cake with a walnut praline topping but I left this part out). It’s one of my other half’s favourite things to bake (and eat!) and he requested it for his birthday this month. He said no frills but as it was a special occasion I wanted to put some time and effort into the decoration, so I added some dark chocolate chips and made a cute cappuccino-style heart in the middle with cocoa powder (okay, I know this is technically straying from the recipe but this was extra to the actual cake!) I’m happy to say Jack was thrilled with it and, even though I HATE coffee as a drink, I loved it too 🙂

20150719_180902INGREDIENTS – makes 2 thick or 3 shallow sponge layers of 18cm/7in in diameter

For the cake:

  • 225g/8 oz self-raising flour
  • 225g/8 oz caster sugar
  • 225g/8 oz butter
  • 4 eggs
  • 1.5 tbsp instant coffee dissolved in 1 tbsp hot water
  • 1 tsp baking powder

For the icing/decorations:

  • 250g/9 oz icing sugar
  • 75g/2.5 oz butter
  • 1.5 tbsp instant coffee dissolved in 1 tbsp hot water
  • 50g/2 oz (approx.) dark chocolate chips
  • 2 tbsp (approx.) cocoa powder
    + a heart (or other shape of choice) cut from card, approx. 6cm/2.5in wide

METHOD

For the cake:

  1. Pre-heat the oven to 160 degrees C (or 140 fan) and line two or three baking tins with parchment paper.
  2. Place all the ingredients in a large mixing bowl and whisk until combined.
  3. Pour the mixture in equal quantities into the prepared cake tins then pop in the oven and bake for around 25-30 minutes (you may need less time if making three shallow layers) until a cocktail stick inserted into the sponges comes out clean.
  4. When baked, leave the cakes to cool on a wire rack before turning them out of the tins. At this stage the sponges can be frozen for decorating at a later date if you wish.

For the icing/decorations:

  1. Place the butter and coffee in a bowl and sift in the icing sugar (I’m normally too lazy to do this but it does make for a lovely smooth buttercream!) then whisk until a smooth, spreadable mixture has formed.
  2. Spread half of the buttercream on one of the sponges and sandwich the other on top (do the same for the third layer if you’re using three tins), then spread the rest of buttercream on the top layer.
  3. Place the card heart in the centre of the cake and push down quite firmly so it doesn’t move then sieve the cocoa powder over the entire top surface (don’t worry if the edges are patchy as this will be covered up by the chocolate chips).
  4. Carefully remove the card template then arrange the chocolate chips neatly in pairs in a circle around the edge of the cake.

20150719_181553Cake & buttercream recipe © Mary Berry

Categories: Layer Cakes | Tags: , , , , , , , , , , , , , , , , , | 3 Comments

Banana Toffee Cake with Brown Sugar Buttercream

Originally posted 21/05/2015

As a keen and frequent baker, I’m not quite sure why I’d never made banana bread/cake before as I love bananas and it’s pretty much a failsafe culinary venture. In fact, it almost seems to be a rite of passage recipe for those who begin to pursue an interest in baking. Anyway, when the time came to make a cake for my mum and dad’s joint birthday celebrations back in April, I wanted to make something different that I hadn’t tried before which would be indulgent but not too complicated. I decided to do a banana cake but with added toffee flavouring, and paired with a brown sugar buttercream and chopped up Caramac and Chomp bars for extra celebration-appropriate banoffee decadence.

I found that the brown sugar buttercream was a bit thinner than normal frosting but if you need it to be stiffer just add in some extra icing sugar.

INGREDIENTS – makes 2 sponge layers of 8in/20cm diameter

For the cake:

  • 225g/8 oz self-raising flour
  • 100g/3.5 oz granulated/caster sugar
  • 90g/3 oz dark brown sugar
  • 225g/8 oz butter/margarine
  • 4 eggs
  • 2 ripe/over-ripe bananas, peeled and mashed
  • 1 tsp vanilla extract
  • 1 tsp Lakeland buttery caramel flavouring (optional but delicious)
  • Half a tsp baking powder

For the buttercream/topping:

  • 100g/3.5 oz butter
  • 100g/3.5 oz dark brown sugar + a few pinches for sprinkling
  • 100g/3.5 oz icing sugar
  • Few drops of Lakeland buttery caramel flavouring (again, optional but so good!)
  • 2 Chomp bars (or other toffee/caramel chocolate)
  • 1 Caramac bar

METHOD

For the cake:

  1. Pre-heat the oven to 180 degrees C (or 160 fan) and line two round baking tins with parchment paper.
  2. Whisk the butter/margarine and sugars together in a large mixing bowl until pale then whisk in the eggs.
  3. Fold in the flour, mashed bananas, vanilla extract, caramel flavouring and baking powder until a batter of a soft dropping consistency has formed.
  4. Pour the mixture into the prepared cake tins then pop in the oven and bake for around 20-25 minutes until a cocktail stick inserted into the sponges comes out clean.
  5. When baked, leave the cakes to cool on a wire rack before turning them out of the tins. At this stage the sponges can be frozen for decorating at a later date if you wish.

For the buttercream & topping:

  1. Place the butter, caramel flavouring and brown sugar in a bowl then whisk while gradually adding the icing sugar until a smooth mixture has formed.
  2. Spread half of the buttercream on one of the sponges and sandwich the other on top, then spread the rest of buttercream on the top layer.
  3. Chop the Caramac and Chomp bars into small squares using a sharp knife or scissors then place them on top of the cake before finishing off with a few sprinkles of brown sugar.

I also used this recipe to make cupcakes to take to my old workfriends 🙂 The above quantities will yield about 15-18 cupcakes.

Categories: Icing, Layer Cakes | Tags: , , , , , , , , , , , , , , , | 2 Comments

Custard Cream Cake

Originally posted 21/03/2015

This recipe is basically a large version of the cupcakes I created but never got round to blogging about, after being inspired by the custard cream biscuits I made here.

I made this quick and simple cake on a whim while round my other half’s after discovering he had custard powder in the cupboard and it was absolutely scrumptious with its light sponge, smooth icing and lovely vanilla flavour. If you want to make it a bit more of a ‘show stopper’ bake by all means double the quantities and make it as a double layer cake sandwiched with extra custard buttercream and top with some custard cream biscuits or other decorations to finish. But if you’re just after something delicious with minimal faff then look no further than the recipe below 🙂

I love the sunshine yellow colour!

INGREDIENTS – makes 1 deep sponge of approx. 8in/20cm diameter

For the cake:

  • 160g/5.5 oz self-raising flour
  • 170g/6 oz caster/granulated sugar
  • 170g/6 oz butter/margarine
  • 3 eggs
  • 2 heaped tbsp custard powder
  • 2 tsp vanilla extract

For the icing:

  • 100g/3.5 oz icing sugar
  • 50g/2 oz butter (unsalted if preferred)
  • 1 tbsp custard powder
  • 1 tsp vanilla extract

METHOD

For the cake:

  1. Pre-heat the oven to 180 degrees C (or 160 fan) and line the cake tin with parchment paper.
  2. Whisk the butter/margarine and sugar together in a large mixing bowl until pale then whisk in the eggs.
  3. Fold in the flour, custard powder and vanilla extract until a batter of a soft dropping consistency has formed.
  4. Pour the mixture into the prepared cake tin and bake for around 20-25 minutes until a cocktail stick inserted into the sponge comes out clean.
  5. When baked, leave to cool on a wire rack before turning the sponge out of the tin. At this stage the cake can be frozen for decorating at a later date if you wish.

For the icing:

  1. Place the butter and vanilla extract into a bowl and whisk while gradually adding the icing sugar and custard powder until a thick, fluffy mixture has formed.
  2. Spread the icing onto the top of the cooled cake using a palette knife, then dive in!

Edit: I used this recipe as a base for a custard and rubber duck loving colleague’s birthday cake!

cake
Categories: Layer Cakes | Tags: , , , , , , , , , , , , | 4 Comments

Create a free website or blog at WordPress.com.